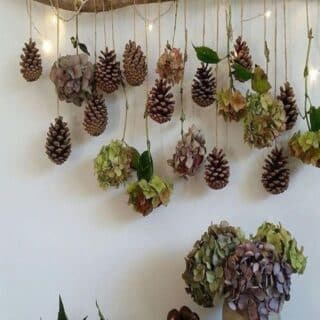
Fall and Christmas is fast approaching. These are without a doubt my favorite times of the year. And what will start off these lovely seasons better than DIY bleached Pine cones.
Bleached Pine Cones will add a unique touch to your decorations.
Me personally, I just can’t get enough of them. Pine cones are so versatile and a natural element that can add charm and rustic beauty to your home decor. Perfect for that country life feeling. Bleaching them not only softens their natural color but also gives them a unique, elegant look that’s perfect for all those cozy, elegant seasonal decorations. Whether you’re gearing up for the holiday season or just looking to create a timeless centerpiece, it’s an excellent choice. This guide will walk you through the process of bleaching pine cones safely and effectively.
If you’re anything like me I bet you already have a few pine cones in your decor already. Adding these soft, weather colored ones will not only take the decorations up a notch but also give them that rustic look.
Creative Uses
Bleached Pine cones are perfect for various craft projects. Here are some creative ideas how to use your newly bleached cones:
-Holiday Decor: Use in wreaths, garlands, or as tree ornaments for a rustic yet elegant holiday look.
-Centerpieces: Create stunning table centerpieces by combining with candles, greenery, or flowers.
-Home Accents: Fill a decorative bowl or basket with for a simple, stylish home accent.
DIY bleached pine cones is not only an easy but also a rewarding project that can add a touch of elegance to your home decor. With just a few materials and some patience, you can transform ordinary pine cones into beautiful decorations suitable for any season.
Looking for inspiration on what to do with all your lovely Pine cones? Take a look at these links below:

Bleached pine cones
Equipment
- 1 10 L Bucket
- 1 Rubber gloves
- 1 Plate
Ingredients
- Pine cones
- Chlorine
Instructions
- Gather enough Pine cones to fill a 10 L bucket
- Fill bucket with clorine, approximetly 8-9 L
- Make sure all Pine cones are submerged (the volume of cones will become smaller as they close up)
- Put a weight on top of the cones to keep them submerged. An upside down plate works fine.
- Afer 3-6 days the pine cones are ready to be rinsed and dried. Check your cones after 3 days and take out those that are bleached, leave the rest and check daily
Notes
– Patience: Bleaching pine cones is a slow process. Don’t rush it; allow ample time for soaking and drying.
